手把手部署 wr.do 教程
手把手部署 wr.do
0. Installation
git clone https://github.com/oiov/wr.do
Enter in the folder and install dependencies for your project:
cd wrdo
pnpm install
Create a .env file
Copy/paste the .env.example in the .env file
1. Configure the Database
Prepare the Server Database Instance and Obtain the Connection URL
Before deployment, make sure you have prepared a Postgres database instance. You can choose one of the following methods:
- A. Use Serverless Postgres instances like Vercel / Neon;
- B. Use self-deployed Postgres instances like Docker.
The configuration for both methods is slightly different, and will be distinguished in the next step.
Add Environment Variables in Vercel
In Vercel's deployment environment variables, add DATABASE_URL and other environment variables,
and fill in the Postgres database connection URL prepared in the previous step.
The typical format for the database connection URL is
postgres://username:password@host:port/database.
DATABASE_URL=
Deploy Postgres
pnpm postinstall
pnpm db:push
Add the AUTH_SECRET Environment Variable
The AUTH_SECRET environment variable is used to encrypt tokens and email verification hashes(NextAuth.js).
You can generate one from https://generate-secret.vercel.app/32:
AUTH_SECRET=a3e686f39b2a878c6866e4604e6f1b1b
2. Configure Authentication Service
The server-side database needs to be paired with a user authentication service to function properly. Therefore, the corresponding authentication service needs to be configured.
We provide the following authentication services:
- Github
- LinuxDo
- Resend Email Verification
Google config
In this section, you can update these variables:
GOOGLE_CLIENT_ID = your_secret_client_id.apps.googleusercontent.com;
GOOGLE_CLIENT_SECRET = your_secret_client;
See config tutorial in Authjs - Google OAuth.
Github config
In this section, you can update these variables:
GITHUB_ID = your_secret_client_id;
GITHUB_SECRET = your_secret_client;
See config tutorial in Authjs - Github OAuth.
LinuxDo config
LinuxDo_CLIENT_ID=
LinuxDo_CLIENT_SECRET=
See config tutorial in Connect LinuxDo.
Resend Email Verification config
Create an account
If don't have an account on Resend, just follow their steps after signup here.
Create an API key
After signin on Resend, he propurse you to create your first API key.
Copy/paste in your .env file.
RESEND_API_KEY = re_your_resend_api_key;
3. Cloudflare Configs
Before you start, you must have a Cloudflare account and be hosted on Cloudflare.
Add the CLOUDFLARE_ZONE_ID Environment Variable
This is the unique identifier for your Cloudflare zone. You can find it in the Cloudflare dashboard under the Overview section of your domain.
Follow this way, and scroll down to
Zone ID.
Add the CLOUDFLARE_API_KEY Environment Variable
This is the API key that you use to authenticate requests to the Cloudflare API. You can generate or find your API key in the Cloudflare dashboard under the profile -> api-tokens section.
Follow https://dash.cloudflare.com/profile/api-tokens, and scroll down to
API Token, theGlobal API Keyshould be used.
Add the CLOUDFLARE_EMAIL Environment Variable
This is the email address associated with your Cloudflare account. It is used for authentication alongside the API key.
Add the CLOUDFLARE_ZONE_NAME Environment Variable
This is the name of your Cloudflare zone. It is used to specify the zone in the Cloudflare API requests.
In this section, you can update these variables:
CLOUDFLARE_ZONE_ID=abcdef1234567890
CLOUDFLARE_ZONE_NAME=wr.do
CLOUDFLARE_API_KEY=1234567890abcdef1234567890abcdef
CLOUDFLARE_EMAIL=user@example.com
4. Email Worker Configs
See detail in Email Worker.
After you have completed the above steps, you need add a public domain for r2 storage.
Via:
https://dash.cloudflare.com/[account_id]/r2/default/buckets/[bucket]/settings
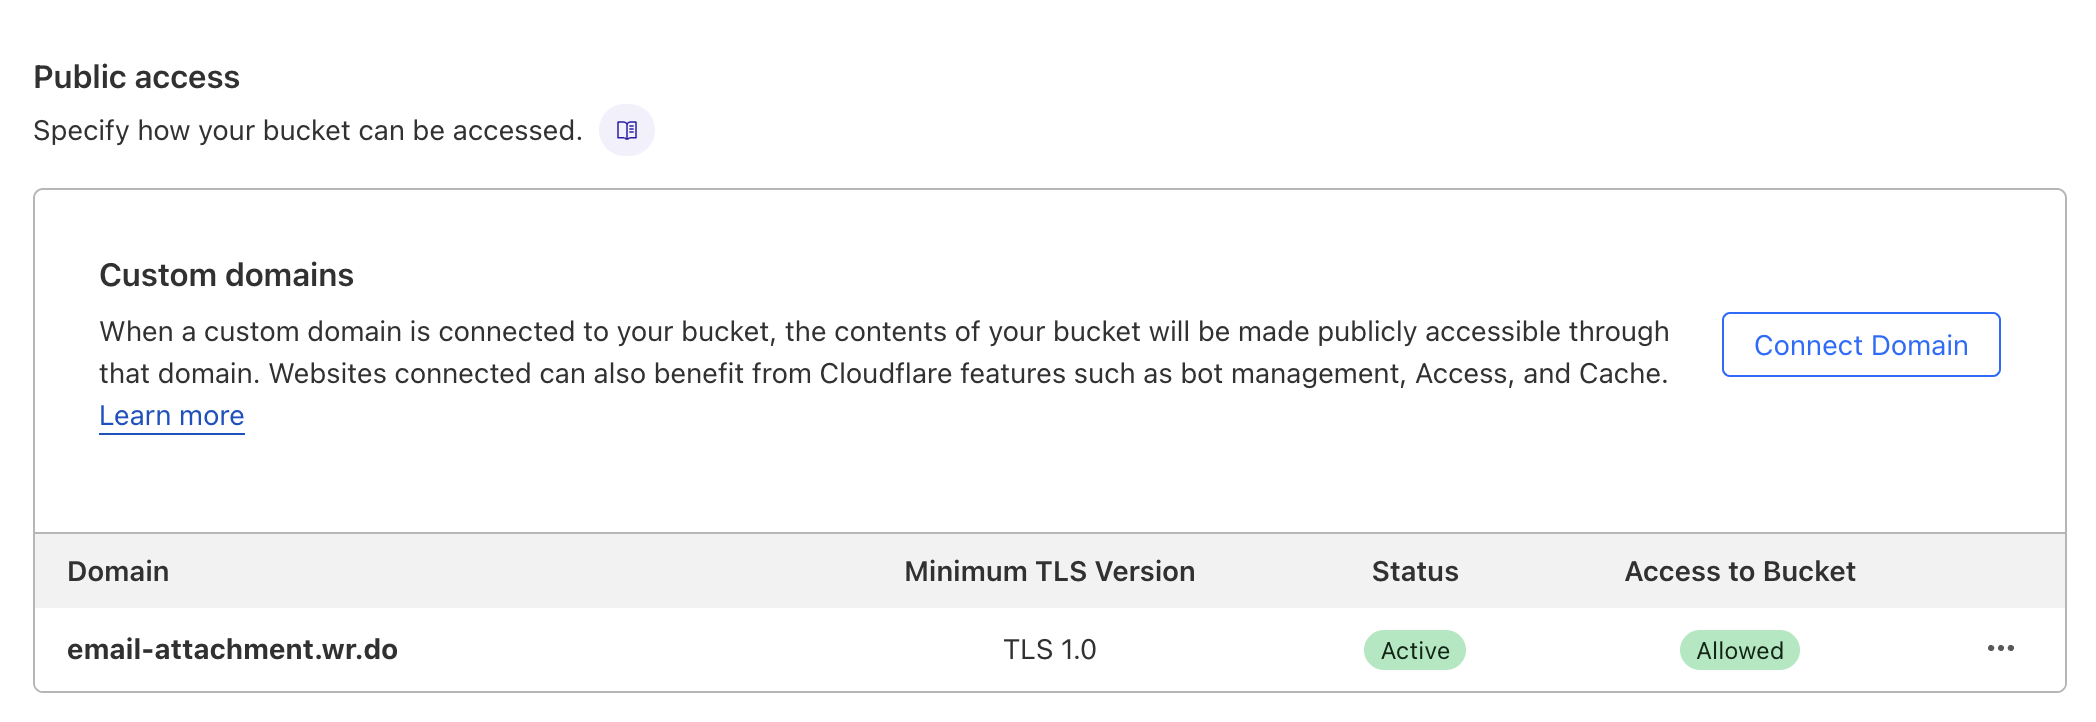
NEXT_PUBLIC_EMAIL_R2_DOMAIN=https://email-attachment.wr.do
5. Add the Bussiness Configs
# Allow anyone to sign up
NEXT_PUBLIC_OPEN_SIGNUP=1

# Short domains. Separated by `,`
NEXT_PUBLIC_SHORT_DOMAINS=wr.do,uv.do

# Email domains. Separated by `,`
NEXT_PUBLIC_EMAIL_DOMAINS=wr.do,uv.do
6. Add the SCREENSHOTONE_BASE_URL Environment Variable
It's the base URL for the screenshotone API.
You can deploy your own screenshotone API from jasonraimondi/url-to-png. Deploy docs via here
SCREENSHOTONE_BASE_URL=https://api.screenshotone.com
7. Add the GITHUB_TOKEN Environment Variable
Via https://github.com/settings/tokens to get your token.
GITHUB_TOKEN=
8. Start the Dev Server
pnpm dev